Manually add an account to InboxGuardian

This tutorial will go through the steps required to manually add an account to InboxGuardian

Back to tutorials

1.


When InboxGuardian first starts the "Set Up Process" should start automatically, as shown on the right.

If not go to the accounts tab and click the Add Account button.

If you are using Microsoft Outlook then all your accounts should appear in the "import" section.

However in this tutorial we are going through the manual adding of an account.

Click the "Manually Add Email Account" button to proceed.

2.


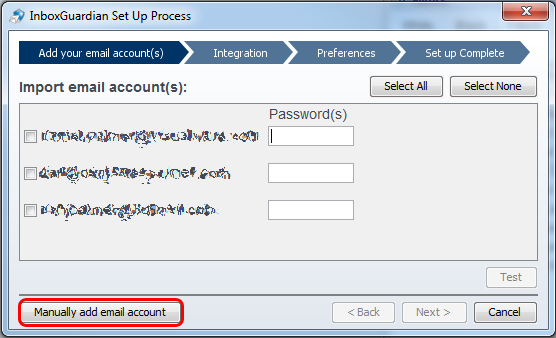
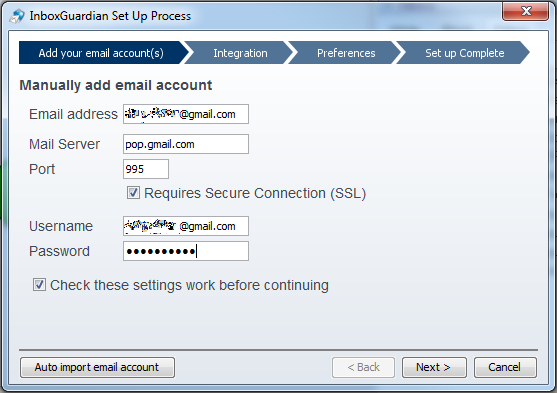
The manual add dialog is shown on the right. In this example we are using a gmail account.

InboxGuardian requires POP access (does not support IMAP) to your email account.

If you're unsure of what settings to use then double check with what you have set up in your email program (Outlook, Thunderbird etc). If you're using a web based service (like Gmail) then you can normally use Google to locate the appropriate settings (for example "gmail pop settings").

We recommend leaving "Check these settings work before continuing" checked to make sure you have the correct settings.

Once you are finished with this step click the next button.

3.


The next step explains Integration (note if you're auto adding accounts from Outlook you have the option of Auto Integrating at this step).

More information on what Integration is can be found here. Integration is recommend so it's worth reading up on in the future and contacting support if you have any queries.

For now we're just concentating on adding an account so click the Next button to continue.

4.


The next step is to make there key preference choices.

1) Show the Unsure tab - as we're not using integration at this stage leave this unchecked. When integrated with your email application the Unsure tab would hold email that didn't match a whitelist or a blacklist.

2) Keep spam email for X hours - it's recommended to keep spam email for at least a small period of time incase you accidently delete an email

3) Clean email every x minutes - This setting instructs InboxGuaridan to fetch email at regular intervals

5.


That completes the manual add. Simply click the Finish button to complete the process and return to InboxGuardian.

6.


InboxGuardian should autoamatically start receiving email for the account you have just added.

These emails will appear in the section shown in the image on the right.

There are some default filters already set up with InboxGuardian so you may see some email move to the Spam folder.

You're now free to delete emails you don't want, add filters and white/blacklists etc. Be sure to check out other tutorials if you get stuck.

If you need further help don't hesitate to contact support.


Home | Contact Us | About Us