Manually Integrate InboxGuardian into Outlook (2010)

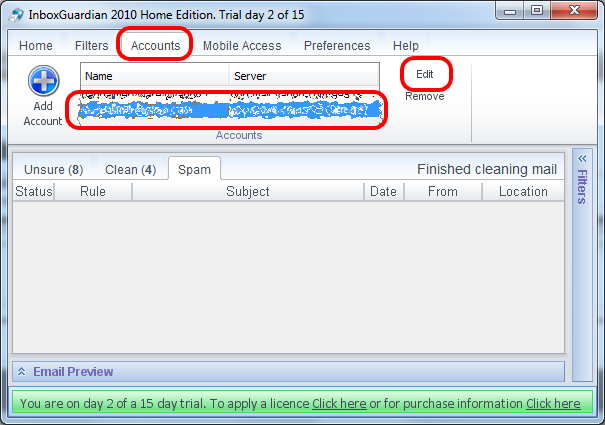
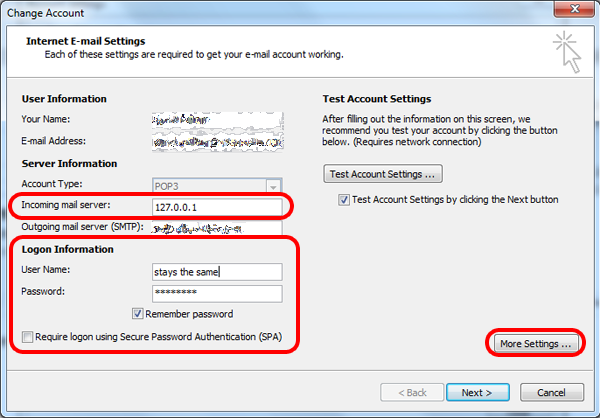
This tutorial assumes you have successfully added at least one email account to InboxGuardian.
This tutorial is designed to help you integrate with Outlook (2010)

Back to tutorials

1.


The first step is to note the settings required for each email account.

This is done by going to the Accounts tab, selecting an email account and clicking the Edit button, as shown on the right.

2.


The second step is to note the Email Client Integration settings shown at the bottom of the edit mail account dialog as shown on the right.

In this case the POP server is 127.0.0.1 and the port is 110.

The username and password are usually the same. The only time this can change is when two accounts have the same username.

3.


Open the accounts settings in Outlook.

In this example we are using Outlook 2010 but the process is similar in other versions of Outlook.

Go to the File tab and choose Info (should already be selected) from the left hand menu.

Hover the cursor of the Account Settings button and click on the resulting drop down option, as shown in the image to the right.

4.


Go to the Email tab.

Select the email account that corresponds with the email account you have added to InboxGuardian.

Click the Change button to launch the settings dialog for that account.

5.


This dialog is where the settings from InboxGuardian need entering.

The first settings is the POP server. Another name for this is Incoming Mail Server. Simply enter the number shown in InboxGuardian, in this case 127.0.0.1

Make sure Require logon using Secure Password Authentication (SPA) is Unchecked.

The log on information shouldn't change, if it differs then make the changes in the section shown.

The third step is the port number, click More Settings to launch that dialog.

6.


Click the Advanced Tab.

Make sure the Incoming server (POP3) setting matches the port number shown in InboxGuardian. In this case 110.

Also make sure This server requires an encrypted connection (SSL) is Unchecked.

Once those settings have been set correctly click the Ok button.

7.


Clicking Ok in step 6 will take you back to the Change Account dialog from point 5.

Click the button on this dialog titled Test Account Settings. This will see if your settings are correct.

If all is well you will see a green tick for the Log onto incoming mail server (POP3). This shows the Outlook has successfully connected with InboxGuardian for that email account.

This account is now integrated and will only get it's email from the Clean tab in InboxGuardian.

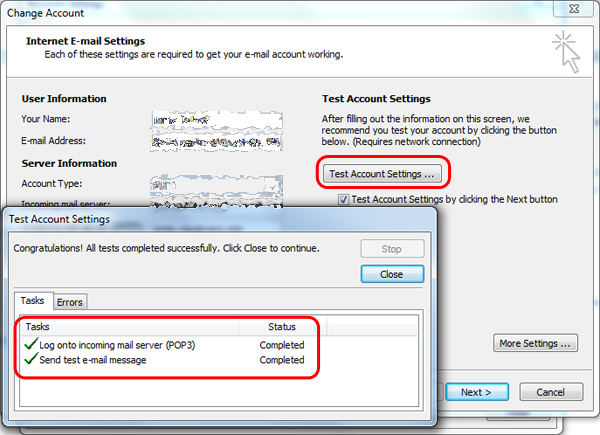
If you need further help don't hesitate to contact support.


Home | Contact Us | About Us